
This was our individual project for this semester. We had to use social media to increase our online presence and for me personally I wanted to increase my traffic to my online portfolio, measuring this by using google analytics. I used Google Analytics to measure the interaction with each post and see how they perform and compare each post to maximise and adapt each post.
When I was starting this project, I looked at existing social media campaigns that have caught my attention as being eye catching and impactful. From this I looked at the different tones and the formality to see what would best suit my campaign. From this I decided to go along the middle. Not too formal and not too informal as I wanted my work to be seen by potential employers.
Before I went live with the campaign, I created the following plan to organise my posts and have them already to go to make it easier and quicker for when the time came to post them. Below was not how it actually went, this is because I implemented feedback that I was given and as the semester went on I had created new work that I wanted to display and replace with some of the less impressive work on the plan.
Click here to Download My Plan

As I was putting out my posts, I monitored them using Google Analytics. I tracked everything from the amount of views, time spent on each page, location of the people viewing it and more. The image to the left is a screenshot of my Google Analytics displaying the statistics of my first post. As you can see the interactions went up a lot and the areas people saw it from was a lot more varied.
Below is the link to the presentation that I created showing the results of each post and the post in question. I also have a brief evaluation of my campaign as a whole and go into more detail on the research I did prior to the campaign. But most importantly I describe how I changed my campaign throughout the time due to feedback and other decisions.
Click here to Download My Presentation
This project was this semesters client project and we were tasked to create a website that brought together the community, the people, and the Spitfire itself. I was tasked to make a 3D model of the plane that would be put on the website as a way to navigate and view information. This project was given to us by someone from IBM who had a passion for the plane as well as the granddaughter of one of the people who was on the team tasked who designed the Spitfire. It felt like we where involved in a real passion project, a privilege.
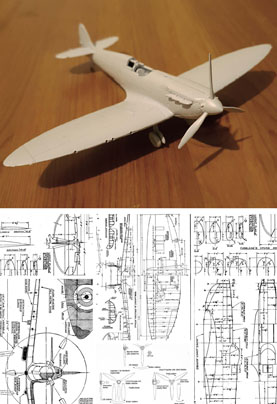
One of the first things I did when I found out about this project was to find out as much as possible the spitfire. Although there is a vast amount of information about the history of the plane there wasn’t a lot about the dimensions and the more intricate parts about its design. This posed a problem as I needed accurate dimensions to crate a detailed CAD model. In order to counter this, I found an old air-fix model, which I gathered a lot of my scaled measurements from. I did find some sort of blueprint for some of the dimensions but a vast majority of the annotations where unreadable since they were written by hand.
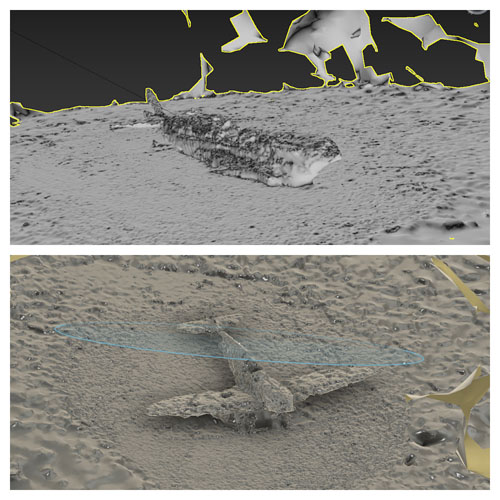
Due to the fact that I had the air-fix model I thought that I would give photo scanning a go. This was not really a success as I feel that my lighting was off, and I was also only using free software which was not the best. Another constraint that the shape of the plane wasn’t the best due to the fact that the wings where thin, I couldn’t photograph the under side of it and the surface was so smooth and was one colour; I think it confused the software. To the side you can see a number of attempts and how they didn’t go to plan
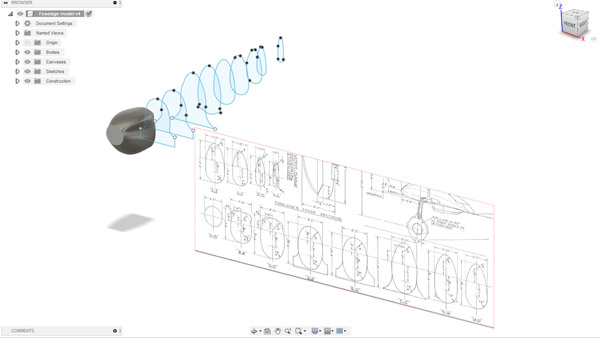
For my second attempt I tried to use the cross sections of the fuselage and loft them out in order to create it. This attempt was successful due to the fact that there weren’t enough cross sections to give enough information and also, It turned into a twisted mess because the lines didn’t line up to the correct locations.
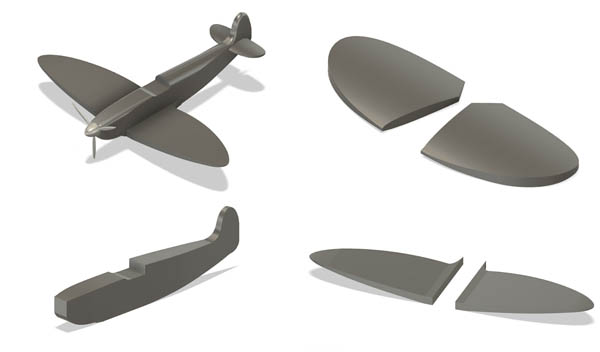
To do this method I started with a large block and above it I traced over the blueprint image I found and did an extrude cut. I then did this from multiple angles to get something that resembled the part that I was trying to re-create. After I had done this with all of the larger parts I then put them all together in an assembly. The only issue with this was the fillets didn’t work particularly well this meant that the outcome was quite blocky, but it did definitely resemble a spitfire. .
For these parts they were not photo accurate, but I was referencing images, so they do resemble the real life part. For theses I screen recorded myself, so you can see the process of me creating them.
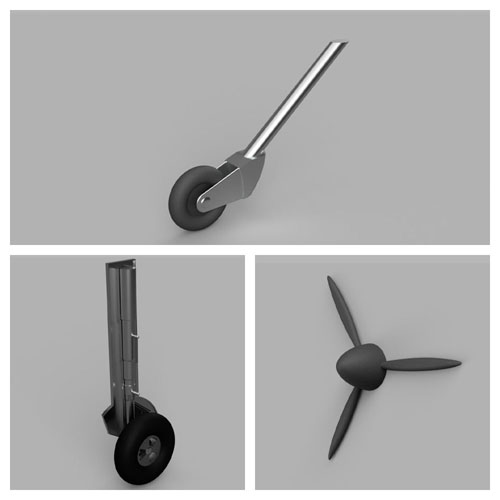
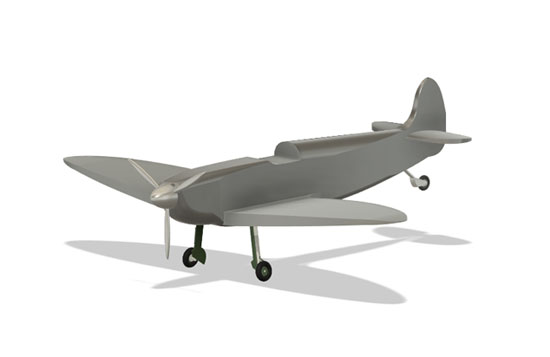
Once I had created all the different parts I then worked on assembling them all in the correct positioning. The image to the side shows the model with all the parts and the wheels all put into position. Although it isn’t and exact recreation of the spitfire it is pretty close and is recognisable. I would then send this off to another group member so they could implement it to the website.
If I had more time and skill I would be able to make a much more accurate looking model of the plane. I would also add the colours and the textures to it to make it even more realistic and maybe add some animation to the model to help show it off. I would love to continue this project as it has captured my interest greatly, but I will have to see what the future will hold. .
For this project as a cohort we were tasked to plan and organise the end of year show. In order to work more efficiently we all split up into groups to dissipate the workload, being assigned a specific part of the show to organise. Me and my group were put in charge of displaying the 3D printers. For this we would have to learn how to run them and make a range of 3D models that we could print throughout the day.
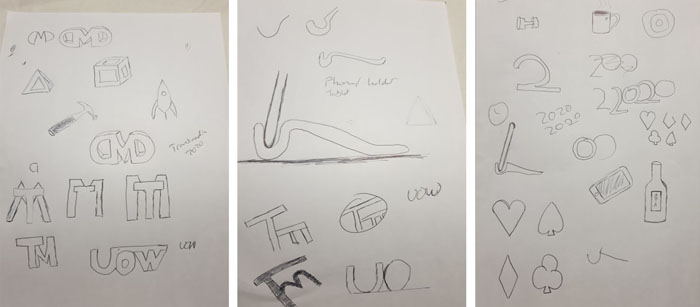
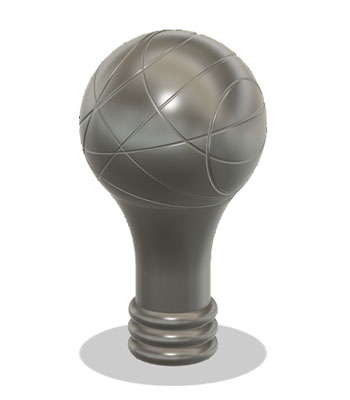
To start with I did some quick sketches to get some initial ideas down on paper. When I did them, I was thinking about different factors such as size, detail and whether the 3D printer will actually be able to print it. Once I had 20 or so I then selected my favourites to receive feedback from the others in my group. Everyone in the group did something similar to this so we all chose our favourites from everyone’s choice, so we knew what we were going to develop into 3D models. .
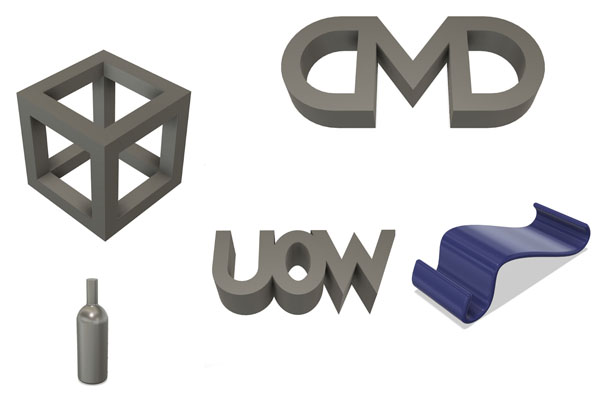
Once we had decided on the sketches, we then started to create the 3D models. I used fusion 360 as it was the most efficient and quickest software to use for these types of models. When I was making them I was always trying to consider the factors I thought about when doing the sketches (size, amount of detail and if it is possible to print the shape) we focused on getting our favoured product finished ready to get it done for a presentation in order to get some feedback.
After the feedback session it was advised that we implement some of the existing branding for the show rather than developing new models that have nothing to do with it. after this advice I went way and started making a 3d version of the logo that was created last semester by a different team. I was able to receive the original model from one of the members of that team. I did not end up using this model in the end, but it gave me an in-depth view of the logo that I could use as a reference. During the feedback session we also learned that only one of the 3D printers was working but it was much larger than we where expecting meaning that the design could be larger and therefor a lot more detail.
Due to the coronavirus out break the end of year show has been postponed so I do not know the end result yet but I am looking forward to get back into contact with my team and be able to finish this off. Hopefully, the show will be an overall success and that we will put on an informative and interesting display and give people an insight to the world of 3D printing especially if they have never seen It before.