For this project I was asked to create a 2D design for the mobile device project. Once I had done this I then worked on preparing an orthographic view of the drawing with dimensions, a table and using fields to make filling the title block as easy as possible.
We were asked to take the 2D drawing from the previous project and put it into 3D using the correct dimensions that I stated in the orthographic drawing. I then went on to colour the model and create renders for the mobile project.
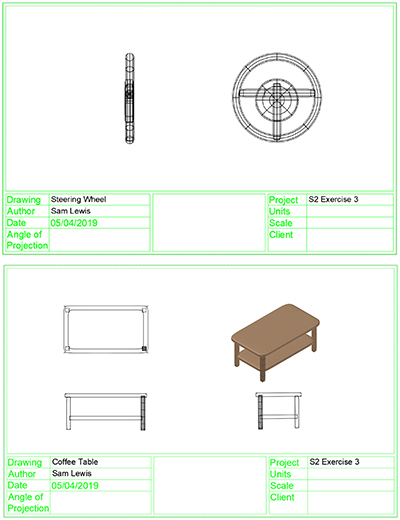
For this exercise we were to create two models using 3D mesh modelling. We had the choice of the following categories that we had to make the models in transport, furniture, electronics or something wearable. One of the models I chose to do was a coffee table which fell under the category of furnisher and the other was a basic steering wheel which I felt full under the category of transport. I then put them on the A3 template I created last semester with multiple views.
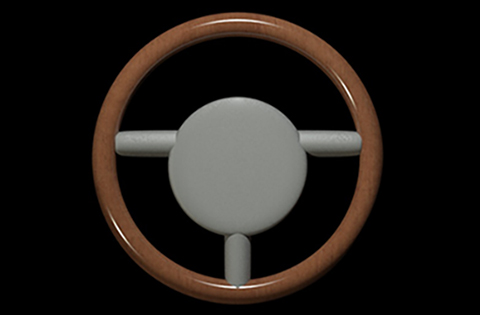
In this task I was asked to take the drawings from the previous task and create one render and one animation. I used the table for the animation, this involved drawing a circle around the table to use as a path and creating a point in the middle of the drawing for the camera to fix on. I then used the basic steering wheel for the render, this involved adding materials/textures to the model and experimenting with lighting. I then rendered the model on a high setting.
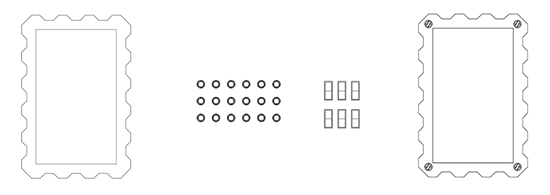
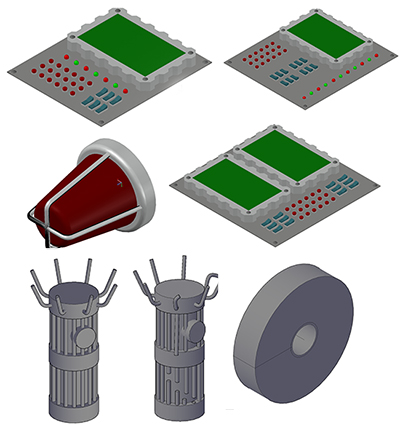
In this task I was given a work sheet and worked through it. I have created 4 dynamic blocks that I could have used when in was making the control panels for the interactive project. The following is in respective order of the picture from left to right: a 2D version of the screen, control buttons, control switches and a full 3D version of the screen. Click the link below to download the dwg.
Click here to Download
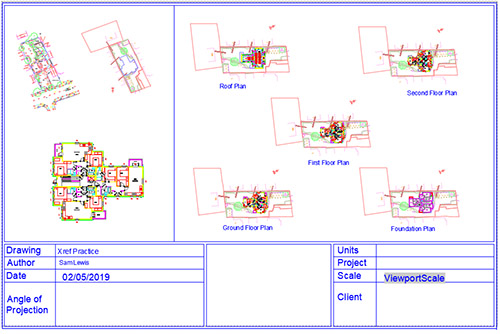
For this week we where given a worksheet explining Xrefs in AutoCAD. The worksheet also had a task that we had to work through. We then had to display what we had done on the A2 template that we did last semester.
Click here to Download
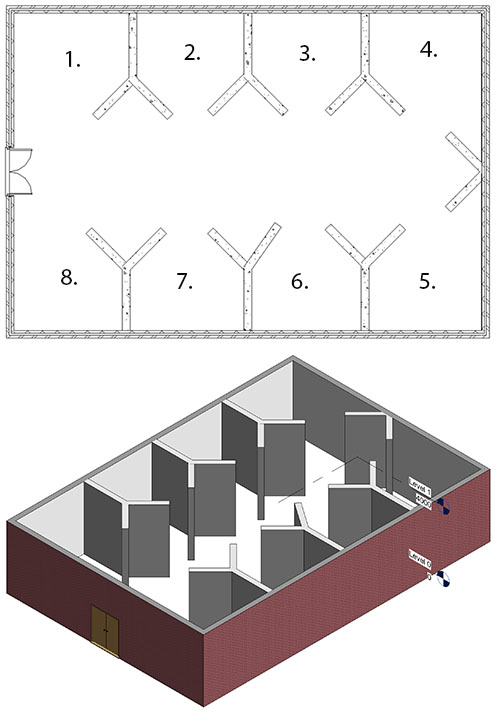
For this task we were asked to think up of a theme for an expedition/gallery and crate a layout, my exhibition is called “The Digital Future of Gaming”
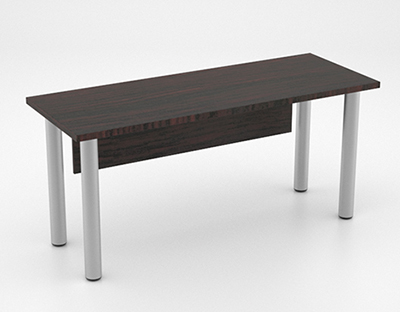
For this ergonomics task I have been told to choose an everyday item and say how I could improve them ergonomically, for this I have chosen the basic desk shown. First of all I would extend the desk slightly and add in some draws so that the user is able to get items quick as they are located at the desk itself. Secondly, I would make an arc cut out in the desk so that the user is able to get closer to the desk meaning they have to lean less making it more comfortable. Finally, I would put in holes at the back for cable management making the desk more organised and easier to maintain.
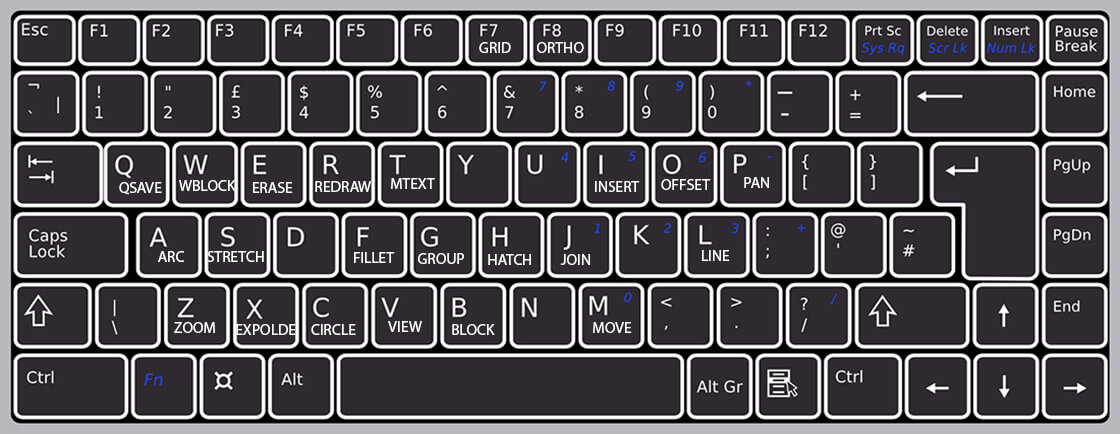
For this task we where looking at the keyboard shortcuts and how useful they are in AutoCAD in order to help me remember the important ones I used photoshop to make the above diagram to show what shortcut does what.
We were asked to create a prototype of piece of technology that could be mobile, portable, wearable or integrated. It didn’t need to be limited to today’s technology, but it still had t have an element of realism to it. There also needed to be corresponding application to the device but it didn’t need to be as fleshed out as the product itself. It also needed to fall under one of the following contexts Travelling on public transport, going to an entertainment event, Buying furniture, Ordering food, Watching a sports event and Presenting to people.
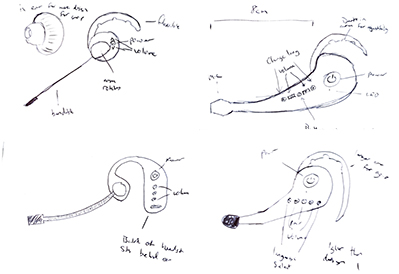
One of the initial ideas that we came up with was a way of storing travel tickets in a shoe sole that would be automatically scanned as you walk past a sensor, but we decided on an automatic translator headset. Once we had agreed on a product me and Javid went away and made our own initial sketches (mine are shown on the left). I then presented my initial sketches to the CAD class to collect some feedback.
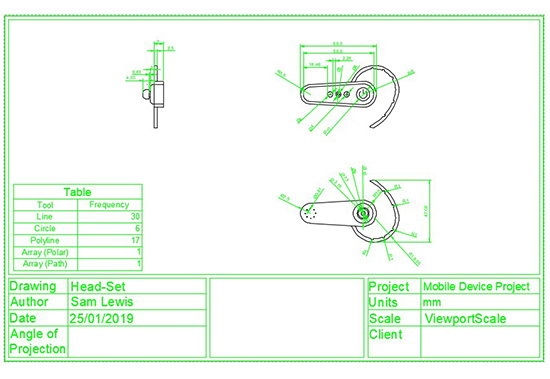
After gaining some feedback on my sketches I decided to slimdown my design a bit. Removed the extended microphone and made it more formal so it could be used in a business environment. After this I then got to work on trying to find some ergonomic data on the arm that goes around the persons ear, I failed to find any data of this type. Instead I got some pipe cleaners and bent them around the ears of friends and family and took the necessary measurements form them and tool an average. From all of this data I developed a fully annotated orthographic drawing of the headset (this is shown on the right).
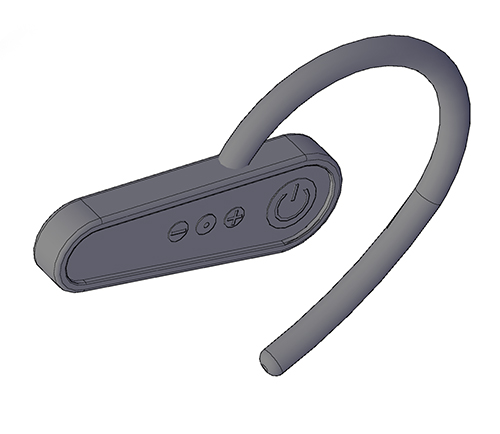
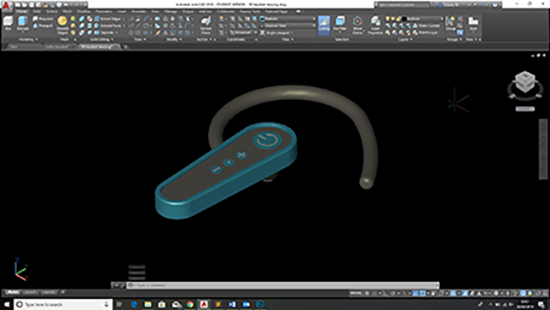
To start making the 2D design into 3D I started off with the making sure that the arm that went around the ear was exactly right and I then made the rest of the headset around it during this part of the process I decided to add the raised symbols for the volume up and down, in order to make them easier to locate when on the head. Some elements of the 2D design didn’t make it into the 3D model due to time constrains or my lack of skill at the time.
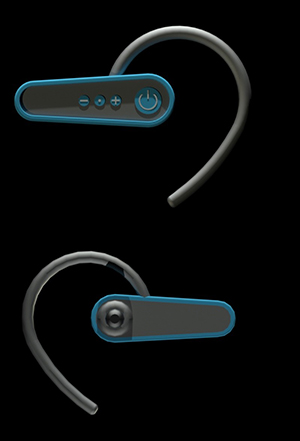
After showing my 3D design to the group and checking that it met the specification I was set. I was given the colour scheme that the designers had agreed on, this was a mix of light blue, light grey and white. I played around with the colours in different locations and whether it looked good glossy or matt. After me and the team where happy with the design I played around some lighting in order to create the renders that can be seen on the right.
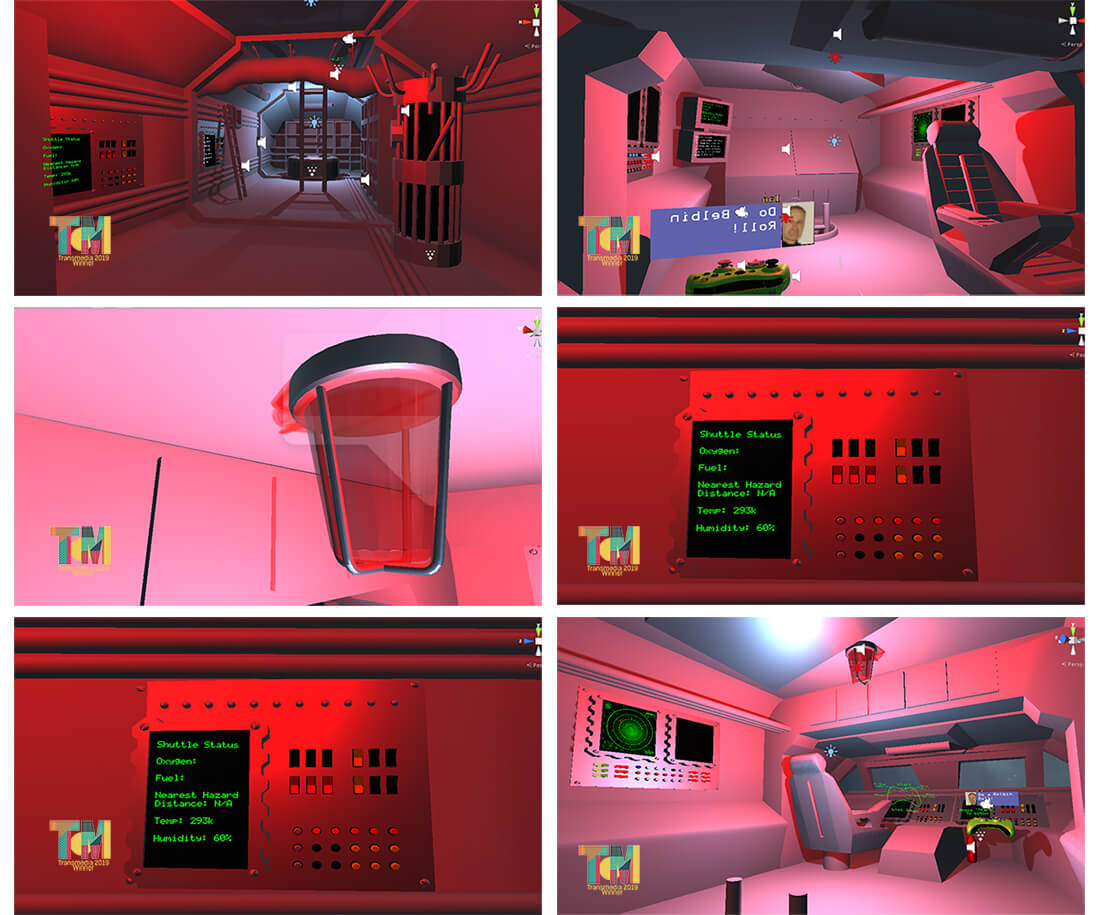
For this project we were asked to create an interactive project that could be shown off the 2019 transmedia end of year show. The project had to fall under the category for school children and had to some what educational. We had a range of technology available including virtual reality, augmented reality, robotics and more. For this project we actually had to produce a finished product, so our ideas had to be realistic.

Our group did find it difficult to think up an initial idea for the project due to the fact that our ideas where ether too ambitious or not ambitious enough, but we finally settled on a space VR escape room type experience. We thought that we would make it as realistic / simulation like to make it somewhat educational. I was tasked to create half of the 3D assists and James Byrne was to the others. To the left is some of my initial sketches for some of the assets.
As accuracy was not vital to this project as anything I made could be easily scaled to size in unity, so I didn’t bother doing 2D drawings of them. Instead I went strait to create them in 3D. I started with creating a control panel. From this one I rearranged the orientation of the screen, switches and buttons in order to make the radio and a range of other options of control panels. I then started to develop the oxygen generator which I needed to create 2 of, one normal and one damaged. I created the normal one first and then changed a copy of it to create the damaged one. Another model I created was the alarm light and a roll of tape (nothing interesting to say about them).
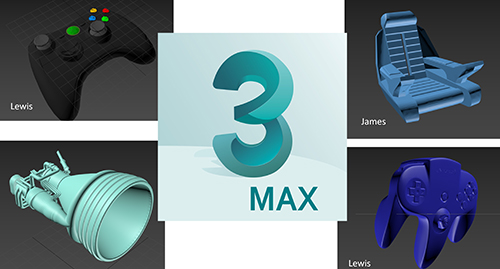
As well as the creating half of the CAD models I also converted all of the DWG files from mine and James’s CAD drawings to FBX files so that the could easily be added to unit and so that Sam Coath could add textures. On the image to the left shows some on the other objects that where found from the internet (the names on the images shows who found them originally) and sent to me to convert to the correct file type.
Once the drawings were the correct file type I put the FBX files onto Trello so that both Sam and Lewis. Lewis was able to create and code the game from all of our collective work. We all had a hand to play in the play testing in order to find any bugs and glitches.